Connecting the battery
General info
Battery connection could be considered the final step before powering up the hardware. It may look as trivial as connecting a phone to the power charger, however it needs way more attention. You may wonder why is that? One reason is that the battery is a 7.4V LiPO type and doesn’t have any protection circuit or BMS (Battery Management System) circuit.
Warning
Do not short the battery terminals! A short at the battery terminals will lead to massive current discharge and will heat up the battery instantaneously, resulting in the battery catching fire or exploding.
Warning
Make sure the polarity is correct before powering up. Wrong polarity will damage the hardware. As you may already know, the battery is a source of continuous electrical current which has two poles: positive (+, anode) and negative (-, cathode).
Now that we passed over the scary warning, let’s play with the wires :).
Powering up
Important
Do all the wire connections without the battery first
Connect the positive end of the battery connector to the 12V pin of the
L298N H-BRIDGE module and the negative end to the GND pin as shown in
Figure 33.
Afterwards, connect the USB cable terminals to the strip connector. The
positive red wire should be connected to the 12V pin, while the negative
black wire should go to the GND pin.
Finally, you can connect the battery via the yellow XT600 connector.
Note
The USB Type C wires could be soldered or directly connected to the strip connector of the H-BRIDGE (without any soldering).
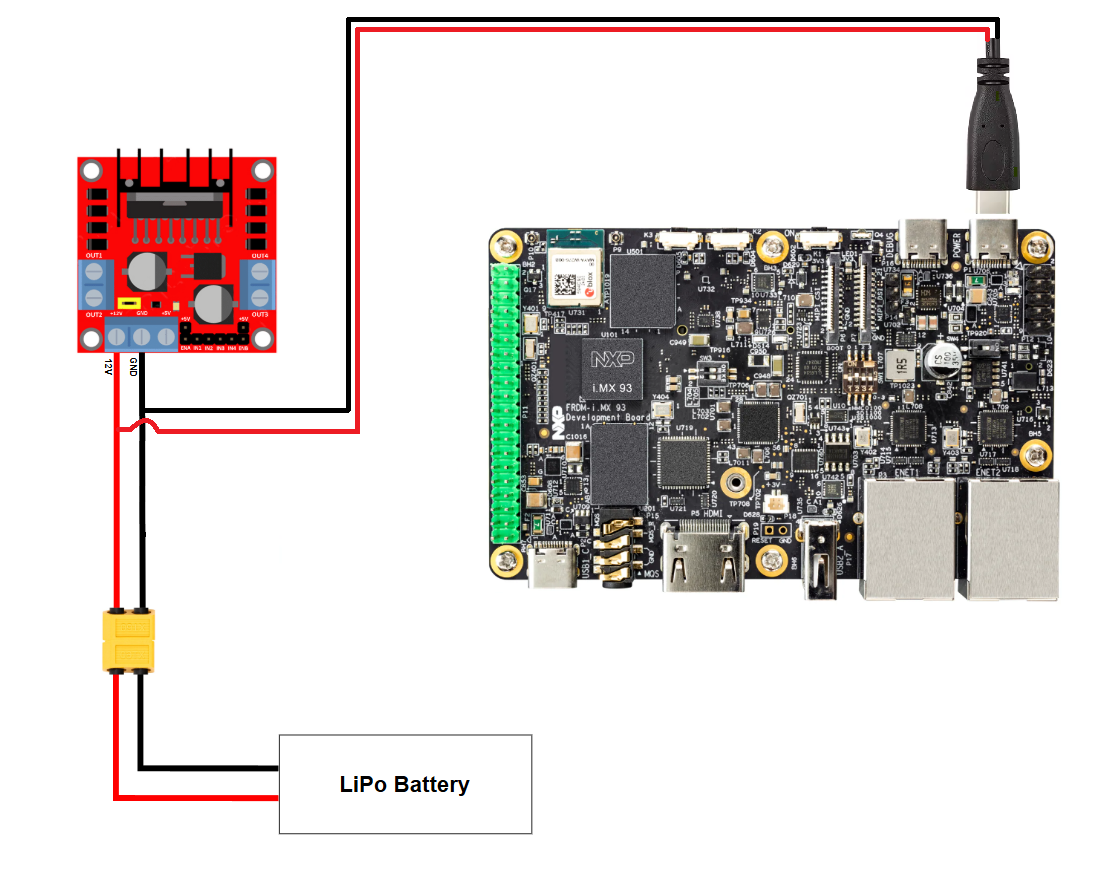
Figure 33 Battery connection diagram